[Unity] New Input System #3 런타임 ReBinding Part 2
이전 포스팅 보러가기
이전 포스팅에서 중복문제를 해결하고 저장하는 부분까지 해보겠습니다.
코드는 이전 포스팅에서 조금씩만 추가하는 형태입니다.
런타임 ReBinding 중복문제
이전 포스팅에서 다른 단축키지만 중복이 가능하여 Q를 누르면 모든 스킬이 실행될 수 있는 문제가 있었습니다. 이를 해결해봅시다.
이전 MyRebindActionUI 스크립트에서 중복 검사를 해주는 함수를 추가해봅시다.
private bool CheckDuplicateBindings(InputAction action)
{
    InputBinding newBinding = action.bindings[0];
    foreach (InputBinding binding in action.actionMap.bindings)
    {
        if (binding.action == newBinding.action)
            continue;
        if (binding.effectivePath == newBinding.effectivePath)
        {
            Debug.Log("Duplicate binding found : " + newBinding.effectivePath);
            return true;
        }
    }
    return false;
}
만약 중복이 있다면 true, 없다면 false를 반환합니다.
중복을 검사하는 방법입니다.
- 해당 InputAction의 InputBinding을 가져옵니다. 저희는 바인딩된 키가 하나씩만 있기에 인덱스가 0입니다.
- 해당 InputAction의 actionMap의 모든 InputBinding들을 가져옵니다. 이러면 자기자신뿐만 아니라 자기가 속한 Map에 모든 InputBinding들을 가져올 수 있습니다.
- 반복문을 돌며 자기자신이면 무시하고, 해당 InputBinding의 경로가 같은 InputBinding이 있으면 중복이 있다는 것으로 판단하고 return true를 합니다.
이 함수를 RebindComplete() 함수에 넣어서 중복검사를 합시다.
private void RebindComplete()
    {
        selectedMarkObject.SetActive(false);
        rebindingOperation.Dispose();
        currentAction.action.Enable();

        if (CheckDuplicateBindings(currentAction.action))
        {
            if (path != null)
                currentAction.action.ApplyBindingOverride(path);
            return;
        }

        ShowBindText();
    }
전의 코드와 다른 점은 중복이 있다면 해당 InputAction의 바인딩경로를 갱신하지 않고 기존의 path로 덮어씁니다.
여기서 기존의 경로인 path는 변수로 추가하고 StartRebinding() 함수에서 갱신합시다.
private string path = null;

public void StartRebinding()
{
    currentAction.action.Disable();
    selectedMarkObject.SetActive(true);

    if(currentAction.action.bindings[0].hasOverrides)
        path = currentAction.action.bindings[0].overridePath;
    else
        path = currentAction.action.bindings[0].path;

    rebindingOperation = currentAction.action.PerformInteractiveRebinding()
        .WithControlsExcluding("<Mouse>/rightButton")
        .WithCancelingThrough("<Mouse>/leftButton")
        .OnCancel(operation => RebindCancel())
        .OnComplete(operation => RebindComplete())
        .Start();
}
만약 InputBinding이 override되지 않았다면 기존의 default 경로를 override되었으면 기존의 override 된 경로를 path에 집어 넣습니다.
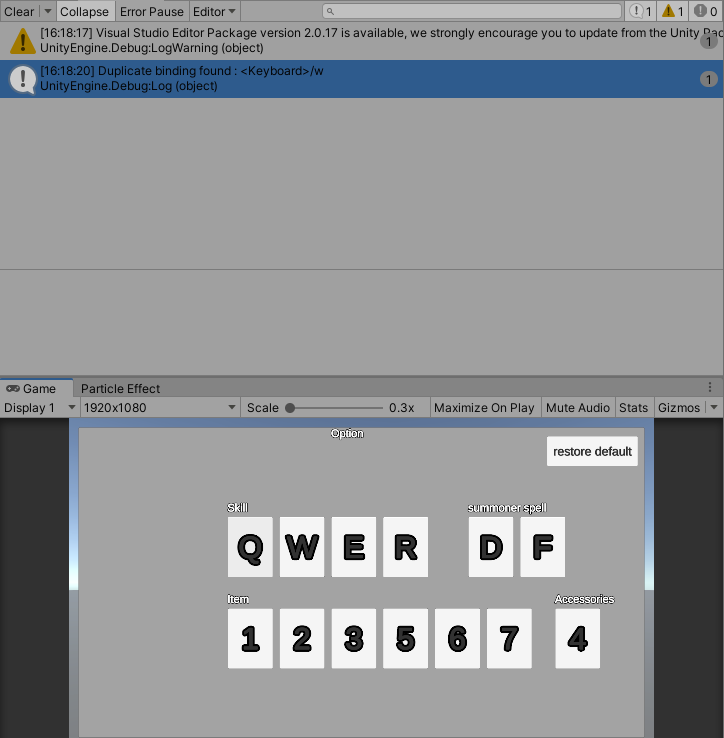
1번 스킬인 Q를 W로 바꿀려고 하면 중복이 있다는 로그와 함께 Rebinding 작업을 하지 않습니다.
런타임 ReBinding 저장 / 불러오기
사실 저장 / 불러오기 기능은 이미 만들어져 있습니다.
그 스크립트를 가져옵시다. 다만 InputSystem Package 1.1 이상부터 가능할 것입니다.
Package Manager에서 InputSystem 검색해서 Sample에 Rebinding UI를 Import 합시다.
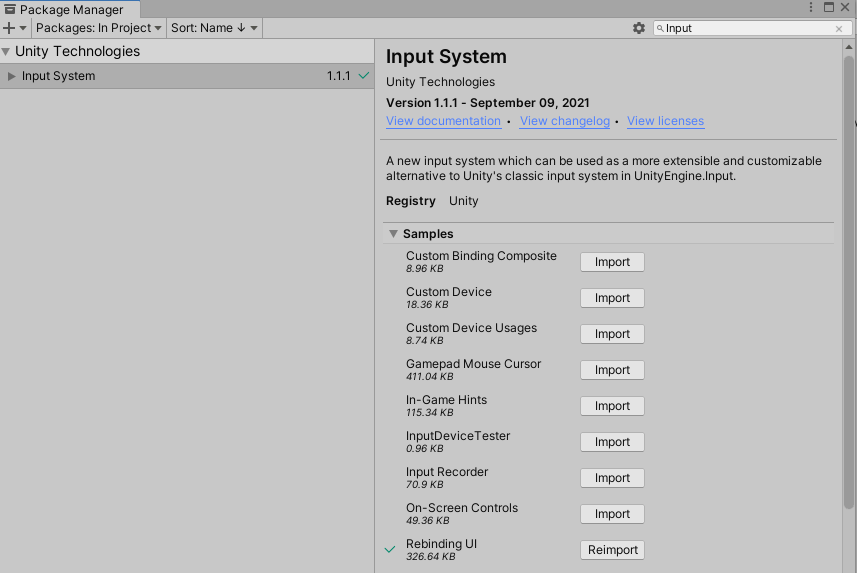
이 Sample에 사실 리바인딩하고 저장하고 등등의 스크립트가 다 있습니다. 저도 여기 코드를 많이 참고했구요.
Sample에 있는 코드도 살펴보시면 좋습니당!
그럼 Sample에 있는 RebindSaveLoad 코드를 살펴봅시다.
using UnityEngine;
using UnityEngine.InputSystem;

public class RebindSaveLoad : MonoBehaviour
{
    public InputActionAsset actions;

    public void OnEnable()
    {
        var rebinds = PlayerPrefs.GetString("rebinds");
        if (!string.IsNullOrEmpty(rebinds))
            actions.LoadBindingOverridesFromJson(rebinds);
    }

    public void OnDisable()
    {
        var rebinds = actions.SaveBindingOverridesAsJson();
        PlayerPrefs.SetString("rebinds", rebinds);
    }
}
코드가 되게 짧습니다.
대체로 보면 InputActionAsset 변수가 있고 이거 통째로 Json 형태로 바꾼 string 값을 PlayerPrefs로 저장/불러오는 방식입니다.
저장, 불러오기 같은 귀찮은 기능을 SaveBindingOverridesAsJson, LoadBindingOverridesFromJson 함수로 쉽게 할 수 있다는게 또 새로운 입력시스템이 장점입니다.
그럼 이 코드를 이용해서 저희 맛대로 써봅시다.
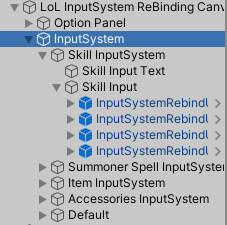
UI의 형태를 보면 버튼들을 스킬, 주문, 아이템, 장신구로 묶었고 또 그걸 InputSystem이라는 GameObject로 묶어놓았습니다.
그럼 저장기능을 InputSystem이라는 곳에 붙여봅시다.
저희는 버튼안에 입력값들도 텍스트로 갱신하고 있기에 추가할 부분이 있어 새로운 스크립트를 만들어야 합니다.

RebindInputSystem이라 명명했습니다.(스크립트 이름은 신경쓰지 마세요… 진짜 생각없이 적었네요…)
저장할 InputActionAsset을 집어놓고 모든 키 버튼들을 List형태로 넣어줍시다.
그럼 코드를 살펴봅시다.
using System.Collections.Generic;
using UnityEngine;
using UnityEngine.InputSystem;

public class RebindInputSystem : MonoBehaviour
{
    public InputActionAsset actions;

    [SerializeField]
    private List<MyRebindActionUI> _myRebindActionUIs = new List<MyRebindActionUI>();

    public void OnEnable()
    {
        var rebinds = PlayerPrefs.GetString("rebinds");
        if (!string.IsNullOrEmpty(rebinds))
            actions.LoadBindingOverridesFromJson(rebinds);

        foreach(MyRebindActionUI myRebindActionUI in _myRebindActionUIs)
            myRebindActionUI.ShowBindText();
    }

    public void OnDisable()
    {
        var rebinds = actions.SaveBindingOverridesAsJson();
        PlayerPrefs.SetString("rebinds", rebinds);
    }
}
저장, 불러오기 방식은 Sample Code와 동일합니다. 거기서 불러올 때 저장된 키 값들로 모든 버튼들의 텍스트를 갱신해줍니다.
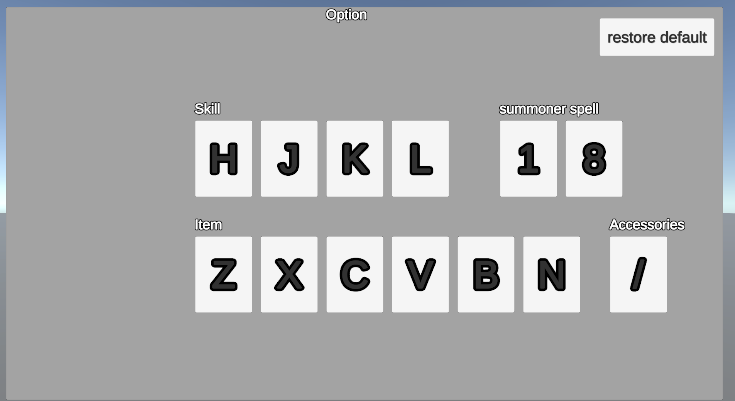
모든 키들을 무작위로 다음과 같이 바꾸고 종료하고 다시 실행해도
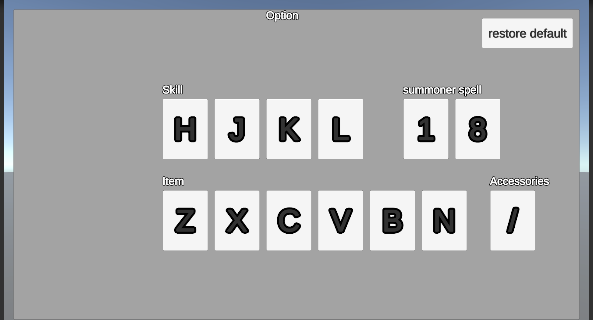
(같은 사진 아님…) 저장과 불러오기가 잘 되어있다는 것을 확인할 수 있습니다.
추가) 기본값 복원
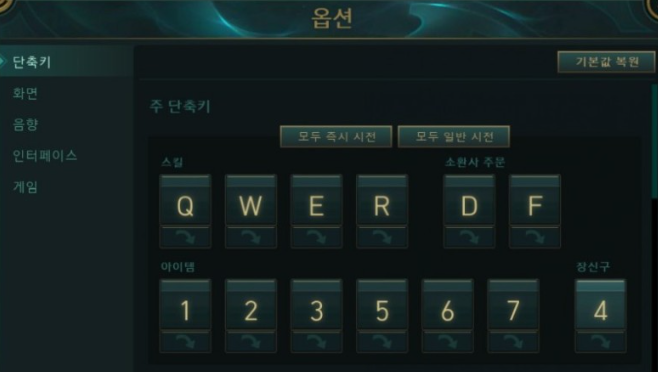
롤에서 보면 기본값 복원이라는 버튼도 있습니다. 이 기능도 만들어봅시다.
InputActionAsset의 모든 InputBinding들의 override된 값들을 지워주면 되는데 이 기능이 함수로 구현되어 있습니다!!
ActionMap의 RemoveAllBindingOverrides()라는 함수입니다. (메소드 이름도 참 잘 지었네요!!)
InputActionAsset의 모든 Map들을 돌면서 해당 함수를 실행해주고 버튼의 텍스트들도 갱신시켜줍시다.
그리고 PlayerPrefs에 저장된 값들도 지워주면 되겠죠.
코드는 다음과 같고 이 함수를 만들어놓은 UI의 restore default 버튼에 OnClick으로 넣어줍시다.
public void resetAllBindings()
{
    foreach (InputActionMap map in actions.actionMaps)
        map.RemoveAllBindingOverrides();

    foreach (MyRebindActionUI myRebindActionUI in _myRebindActionUIs)
        myRebindActionUI.ShowBindText();

    PlayerPrefs.DeleteKey("rebinds");
}
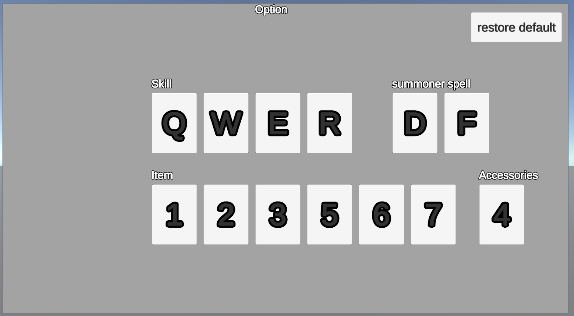
기존의 완전 엉망이었던 단축키들을 초기화시킨 것을 확인할 수 있습니다.
롤 처럼 단축키 하나하나 초기화시킬 수도 있죠. RemoveAllBindingOverrides도 있으니 RemoveBindingOverride 함수도 있습니다.
이것도 만들어놓은 함수를 사용하면 구현하기 쉽지만 저는 구현하지 않겠습니다!! (UI 또 만드는 것도 귀찮구요…)
전체 코드
RebindInputSystem.cs
using System.Collections.Generic;
using UnityEngine;
using UnityEngine.InputSystem;

public class RebindInputSystem : MonoBehaviour
{
    public InputActionAsset actions;

    [SerializeField]
    private List<MyRebindActionUI> _myRebindActionUIs = new List<MyRebindActionUI>();

    public void OnEnable()
    {
        var rebinds = PlayerPrefs.GetString("rebinds");
        if (!string.IsNullOrEmpty(rebinds))
            actions.LoadBindingOverridesFromJson(rebinds);

        foreach(MyRebindActionUI myRebindActionUI in _myRebindActionUIs)
            myRebindActionUI.ShowBindText();
    }

    public void OnDisable()
    {
        var rebinds = actions.SaveBindingOverridesAsJson();
        PlayerPrefs.SetString("rebinds", rebinds);
    }

    public void resetAllBindings()
    {
        foreach (InputActionMap map in actions.actionMaps)
            map.RemoveAllBindingOverrides();

        foreach (MyRebindActionUI myRebindActionUI in _myRebindActionUIs)
            myRebindActionUI.ShowBindText();

        PlayerPrefs.DeleteKey("rebinds");
    }
}
MyRebindActionUI.cs
using UnityEngine;
using UnityEngine.InputSystem;
using TMPro;

public class MyRebindActionUI : MonoBehaviour
{
    [SerializeField]
    private InputActionReference currentAction = null;
    [SerializeField]
    private TMP_Text bindingDisplayNameText = null;
    [SerializeField]
    private GameObject selectedMarkObject;
    [SerializeField]
    private InputBinding.DisplayStringOptions displayStringOptions;

    private InputActionRebindingExtensions.RebindingOperation rebindingOperation;
    private string path = null;

    public void StartRebinding()
    {
        currentAction.action.Disable();
        selectedMarkObject.SetActive(true);

        if(currentAction.action.bindings[0].hasOverrides)
            path = currentAction.action.bindings[0].overridePath;
        else
            path = currentAction.action.bindings[0].path;

        rebindingOperation = currentAction.action.PerformInteractiveRebinding()
            .WithControlsExcluding("<Mouse>/rightButton")
            .WithCancelingThrough("<Mouse>/leftButton")
            .OnCancel(operation => RebindCancel())
            .OnComplete(operation => RebindComplete())
            .Start();
    }

    private void RebindCancel()
    {
        rebindingOperation.Dispose();
        currentAction.action.Enable();
        selectedMarkObject.SetActive(false);
    }

    private void RebindComplete()
    {
        selectedMarkObject.SetActive(false);
        rebindingOperation.Dispose();
        currentAction.action.Enable();

        if (CheckDuplicateBindings(currentAction.action))
        {
            if (path != null)
                currentAction.action.ApplyBindingOverride(path);
            return;
        }

        ShowBindText();
    }

    public void ShowBindText()
    {
        var displayString = string.Empty;
        var deviceLayoutName = default(string);
        var controlPath = default(string);

        displayString = currentAction.action.GetBindingDisplayString(0, out deviceLayoutName, out controlPath, displayStringOptions);

        bindingDisplayNameText.text = displayString;
    }

    private bool CheckDuplicateBindings(InputAction action)
    {
        InputBinding newBinding = action.bindings[0];
        foreach (InputBinding binding in action.actionMap.bindings)
        {
            if (binding.action == newBinding.action)
                continue;
            if (binding.effectivePath == newBinding.effectivePath)
            {
                Debug.Log("Duplicate binding found : " + newBinding.effectivePath);
                return true;
            }
        }
        return false;
    }
}
이것으로 간단한 롤 단축키 설정하는 부분을 완성했습니다.
더 추가하고 싶은게 생기면 이어서 포스팅해보겠습니다
Comments